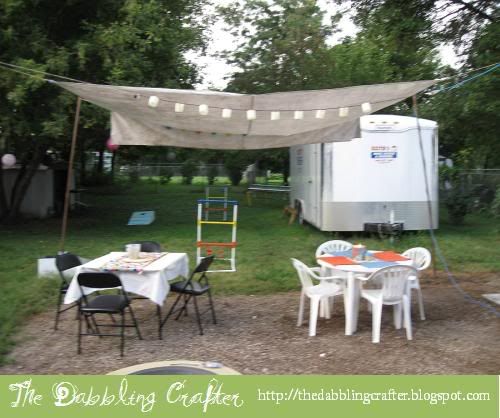
If you’ve read anything craft related over the past couple of months, you’ve been bombarded with outdoor projects. One project I’ve always admired is creating some sort of living outdoor space. One “work weekend” this summer, I decided to create a fun project.
First, I had to get the materials. To be honest, this was completely created on the fly. I went to the hardware store and just bought some stuff.
The materials I ended up with:
4 copper pipes. I found PVC too flimsy. I like the design element of copper as well.
4 Tiki Torch stakes
4 Tarp plastic hooks (found in camping section of retail store)
1 canvas paint tarp
4 plastic clamps
Twine
I didn’t cut the pipes at all. The size I purchased seemed to work just fine.
1. I first got my shovel out and started digging holes. I marked the pipes with tape so I knew how deep to put the pipes in. I had a sort of patio already made so I used that for the dimensions. I figured if I couldn’t find one piece of canvas to fit the whole thing, I would sew something. You might want to measure out the placement of the pipes based on the canvas you purchase.
2. Instead of just putting the pipes in the ground as is, I used some Tiki Torch stakes I already have. You may have seen these before. They are sold next to the torches and are pointy. The pipe slips through the stake. I was lucky that the pipe I picked out fit perfectly. This allowed the pipe to be even deeper into the ground which makes it more stable.
3. After digging the holes, I went around putting the pipes in and filling the holes back up with dirt. I stepped on the dirt to pack it down.
4. Next, I had to come up with some method of putting up the canvas. While wandering around Wal-Mart I found these awesome clamps in the camping area. They are for tarps and clamp down with holes to tie rope around. I had spray paint out for another project so I spray painted them (totally not necessary but why not)
5. So, now I have poles, a canvas canopy and a way to attach to the canvas without cutting and creating holes in the canvas. But how do I attach the canvas to the poles? I grabbed some plastic clamps I already had for my photography things and put them in the holes on top of the poles. Then, I tied the twine around the clamp.
The finished product is a homemade canopy for $50.
It's not perfect by any means. I have since made some changes. I put little holes in the canvas to prevent the canvas flying away in the wind. I am also going to get another canvas and sew them together so the canvas fits the area better. I think I might dye the canvas to make it nicer. These are just potential idea to make the canvas seem more put together.

This is the backyard before I started. The "patio" area hasn't been sprayed yet so you don't see the gravel we put down. It looks like grass at the moment.

Putting the pipes in the ground...

Another pipe done...

Lights for the outdoor area

Outdoor area...weeds are starting to die

Here is the outdoor area ready for a party. The weeds in the patio area have been killed off and there are lights hanging from the canopy. Not bad for 50$!