Tuesday, November 23, 2010

Idea Thief: DIY Duvet Cover

Hi There!

I have been pretty busy with....well I'm not really sure what is keeping me busy. But it seems like I have no time. (Suppose that's motherhood?)

Well here's an awesome project. A really neat duvet cover that will run you about $45 dollars for a king size. I need something for my new bed and this project may eventually make it on my To Do list.

Check out Made by Lex for the tutorial.


Share:

Tuesday, November 2, 2010

DIY Wednesday: Ten Minute Tutu

Hi There!

As you know, Halloween was this week. I wasn't going to do a costume for my little one since she is only five months. Then I saw fairy wings at the dollar store, and figured, eh, why not do something little.

I had tulle given to me by my baby's godmother from my baby shower. So, what can I do with it? Make a tutu for my little baby girl!

For a printable PDF tutorial, click here.


Playtime Tutu

Materials:

-Tulle (I alternated a white tulle and a purple tulle. I ended up using about 6 yards total. Tulle is quite cheap. To save yourself a little cutting, you could use the spools of tulle as well)
-Elastic
-Bucket

Step One: Create Waistband

You will first want to measure out the waistband of your little one. Of course elastic will stretch, but you will want to get a rough idea of how much elastic you will need. Add two inches to the amount you measure.

Overlap the extra inches and sew a zig zag stitch. Ta da, you have a waistband!

Step Two: Cut Tulle


Decide how long you want the tutu to be. If you'd like the tutu to be 20 inches long, fold over the fabric so the doubled up fabric is 20 inches. (It's better if you measure long..you can always cut the tulle once you've completed the tutu if you need to go shorter) Cut along the raw edge.


To create strips, now cut length wise. I made my strips approximately six inches wide; however, I did not measure each strip. I just eyeballed the width.

Step Three: Put It All Together

Grab a bucket. Put the elastic waistband around the bucket. Slip tulle behind the waistband to create a loop and pull remaining tulle through. You have now knotted the tulle on to the waistband. Continue all the way around the bucket.


You now have a fun tutu for dress up, for pictures or for costumes! You can experiment with adding embellishments like flowers or even bows. I think I might try to weave some satin ribbon around the top.





Share:

Wednesday, October 20, 2010

DIY Wednesday: Lace Flower

Hi There!

I have a little project to share today. I am one of those moms that likes to put flower headbands on her little baby. I like how it makes my little one actually look like a girl (since all babies look alike).

This project is very easy and for the flower, you don't even need a sewing machine!


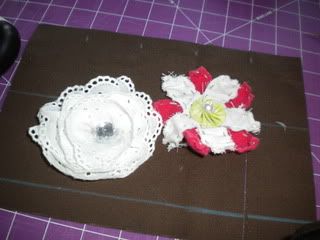
I used this tutorial from Little Miss Momma to make the white lace flower. The other flower is a gift from my sister-in-law Tessa (she made the quilt featured in a previous post)...no tutorial for that one since it's her custom design! You can either attach the flowers to headband like the tutorial suggests. Or do what I do and attach the flowers to alligator clips with hot glue. That allows you to attach the flowers to either headbands or hats.


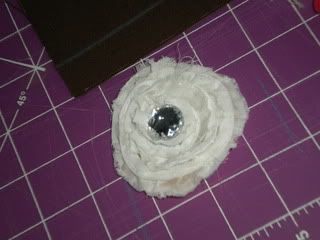
This flower actually came as a mistake. I did the lace flower, but it kinda turned out funny. So I cut away the lace and created this frayed flower. I kinda liked it so I kept it.


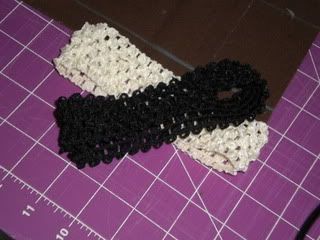
Now you can purchase a headband which can cost upwards of $5. Or you can make your own. Go to the ribbon section and buy the stretchy headband material. At Hobby Lobby the ribbon costs $1 a yard. You can makes lots of headbands within one yard. So...in this picture which one is the store bought one? Which is the home made one? You'll never know!


Share:
Blogger Template Created by pipdig