It's time for another DIY Wednesday. I have never refinished a piece of furniture in my life. Once in middle school I started refinishing my desk with my mother, but to this day, it's only half yellow. (She recently threatened to kidnap it and repaint it)
So, when I started my recent decorating blitz, I decided that my current dressers were clearly an eye sore. One dresser is older than me. I remember the dresser being in my toy room as a kid. We used the dresser to hold my Barbies and my brother's cars. It has always been the same very bright yellow color. In fact, when I removed the drawers to paint them, I saw some drawings my brother and I did when we were young. They were labeled 1993. In high school, I found some discount paint in blue and decided to paint these awful stripes down the front. The result is a very ugly dresser with old yellow paint and new blue stripes. The knobs were gold and white porcelain. Of course, the dresser seemed to lose one of the knobs throughout the years.
The other dresser came from a house my uncle bought. My uncle bought an estate at auction and it was filled with the belongings of the deceased elderly gentleman. He bought this house around the same time I moved into my first house, so many of the belongings made their way to my house. The dresser was cream with black wooden circular knobs. This dresser came with a mirror that had a fake dark wood finish.
Right now, I've only finished the dresser and the mirror. I'm kind-of working on the cream dresser at the moment. (School is distracting me from my craft projects!) I'll post the other dresser when I finish it.
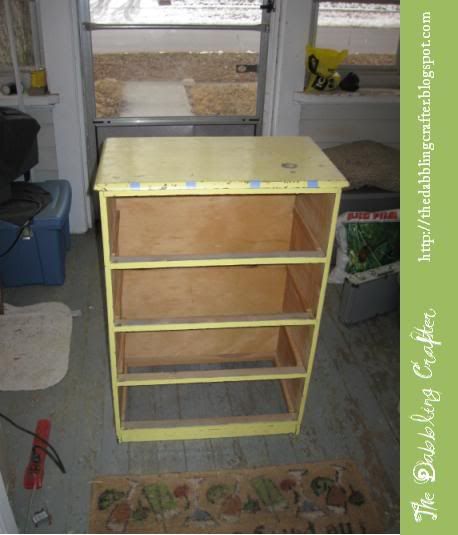
Before Pictures:
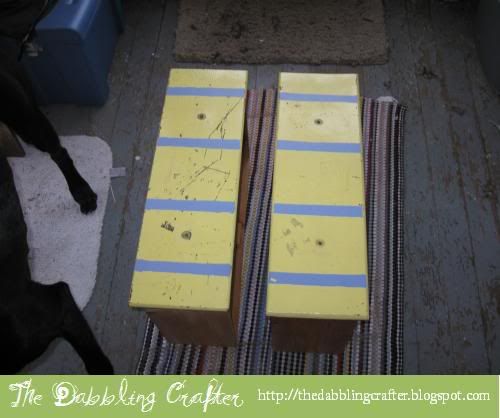
The drawers with their wonderful blue stripes.
I initially started to remove the paint by simply sanding it off. I thought this would be fairly easy since the paint was already flaking off. After finishing the drawers, I decided to use a stripper on the main dresser. I went and bought a gel stripper that was safe to use in a low ventilated area. I did all my work on my enclosed porch with all the windows opened 3 to 4 inches. After stripping, I sanded everything to make sure the surface was smooth.
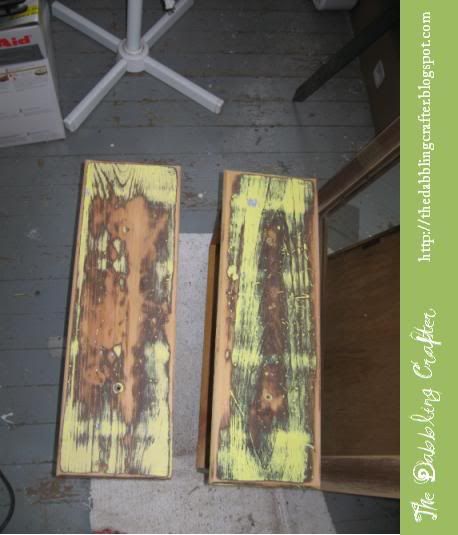
Sanding...didn't get all the paint off even though it was ancient
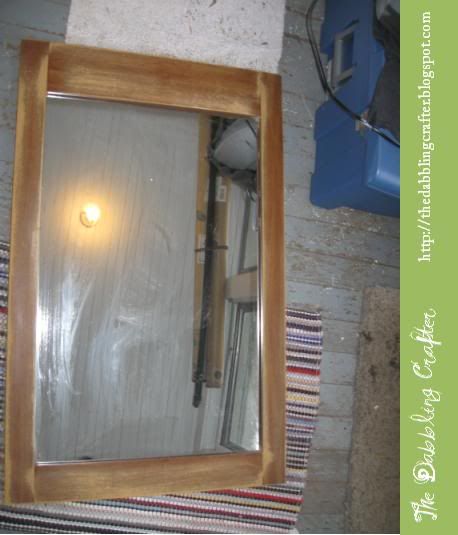
Sanded Mirror. Worked quite well and I didn't need to use the stripper.
After stripping off the existing paint, I primed the surface with some Kitz primer I had sitting around. From what I've read online, this wasn't really necessary since the sanded surface will be enough to grip the paint, but I thought I may as well put a coat since I had some primer sitting around. I then used semi-gloss white interior paint. I used a foam roller to apply the paint. The foam roller should be labelled on the package for use on cabinets or something of that sort. This particular type of roller prevents bubbles or streaking. They are made exclusively for a smooth finish.
After I sufficiently covered the surfaces (3 or 4 coats), I added a layer of polyurethane alternative on the top of the dresser in order to make it a bit more durable. From what I've gathered through my research is oil-based polyurethane will yellow on white. I found a product at Wal-Mart that said it was exclusively for white paint. Just read the backs of each container to see what will work the best. However, I did notice if I cover too thickly, the white paint would get a bit of a red tone. So, be careful about putting too much on!
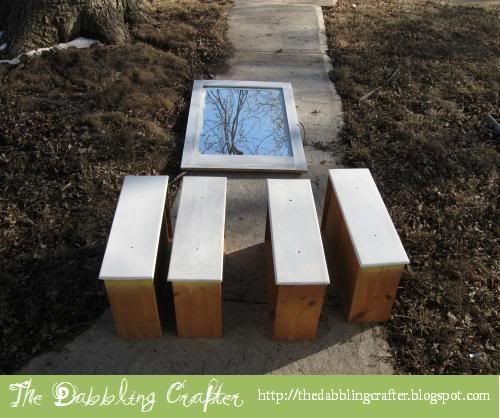
Here's the painted drawers and mirror.
Finally, all I had left was new knobs. Now, I had originally wanted to put funky wallpaper on the front of the drawers. I had seen this done in Better Homes and Gardens last month, and it looked amazing. However, right now I have blue walls and printed curtains. I thought the wallpaper would be too busy. But, I didn't want a simple white dresser either because chances are I will eventually move into a white wall apartment. So, I searched everywhere locally for a few weeks. Finally, I found the knobs I wanted online at LookInTheAttic & Company. After I got the blue glass knobs and put them on the dresser, I realized I probably should have gone with the smaller knobs, but I'm not going to bother to return them.
Here's the finished product!!!
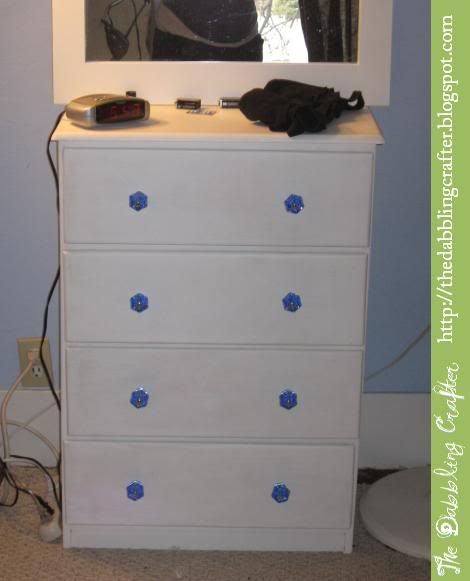
I'm pretty happy with the result.
So, when I started my recent decorating blitz, I decided that my current dressers were clearly an eye sore. One dresser is older than me. I remember the dresser being in my toy room as a kid. We used the dresser to hold my Barbies and my brother's cars. It has always been the same very bright yellow color. In fact, when I removed the drawers to paint them, I saw some drawings my brother and I did when we were young. They were labeled 1993. In high school, I found some discount paint in blue and decided to paint these awful stripes down the front. The result is a very ugly dresser with old yellow paint and new blue stripes. The knobs were gold and white porcelain. Of course, the dresser seemed to lose one of the knobs throughout the years.
The other dresser came from a house my uncle bought. My uncle bought an estate at auction and it was filled with the belongings of the deceased elderly gentleman. He bought this house around the same time I moved into my first house, so many of the belongings made their way to my house. The dresser was cream with black wooden circular knobs. This dresser came with a mirror that had a fake dark wood finish.
Right now, I've only finished the dresser and the mirror. I'm kind-of working on the cream dresser at the moment. (School is distracting me from my craft projects!) I'll post the other dresser when I finish it.
Before Pictures:
The drawers with their wonderful blue stripes.
I initially started to remove the paint by simply sanding it off. I thought this would be fairly easy since the paint was already flaking off. After finishing the drawers, I decided to use a stripper on the main dresser. I went and bought a gel stripper that was safe to use in a low ventilated area. I did all my work on my enclosed porch with all the windows opened 3 to 4 inches. After stripping, I sanded everything to make sure the surface was smooth.
Sanding...didn't get all the paint off even though it was ancient
Sanded Mirror. Worked quite well and I didn't need to use the stripper.
After stripping off the existing paint, I primed the surface with some Kitz primer I had sitting around. From what I've read online, this wasn't really necessary since the sanded surface will be enough to grip the paint, but I thought I may as well put a coat since I had some primer sitting around. I then used semi-gloss white interior paint. I used a foam roller to apply the paint. The foam roller should be labelled on the package for use on cabinets or something of that sort. This particular type of roller prevents bubbles or streaking. They are made exclusively for a smooth finish.
After I sufficiently covered the surfaces (3 or 4 coats), I added a layer of polyurethane alternative on the top of the dresser in order to make it a bit more durable. From what I've gathered through my research is oil-based polyurethane will yellow on white. I found a product at Wal-Mart that said it was exclusively for white paint. Just read the backs of each container to see what will work the best. However, I did notice if I cover too thickly, the white paint would get a bit of a red tone. So, be careful about putting too much on!
Here's the painted drawers and mirror.
Finally, all I had left was new knobs. Now, I had originally wanted to put funky wallpaper on the front of the drawers. I had seen this done in Better Homes and Gardens last month, and it looked amazing. However, right now I have blue walls and printed curtains. I thought the wallpaper would be too busy. But, I didn't want a simple white dresser either because chances are I will eventually move into a white wall apartment. So, I searched everywhere locally for a few weeks. Finally, I found the knobs I wanted online at LookInTheAttic & Company. After I got the blue glass knobs and put them on the dresser, I realized I probably should have gone with the smaller knobs, but I'm not going to bother to return them.
Here's the finished product!!!
I'm pretty happy with the result.


