The party has came and gone. It was a huge success. I think everyone had a great time, and I am pretty sure my daughter will be talking about it all year long. Click here for the Party Reveal Post.
I did quite a few projects for the party, and I thought it was a good idea to do a round up in one post.

Here's 20 DIY Frozen themed party projects!
1. Indoor Snowball Fight

2. Foam Board 3-D Trees

Find the Tutorial Here.
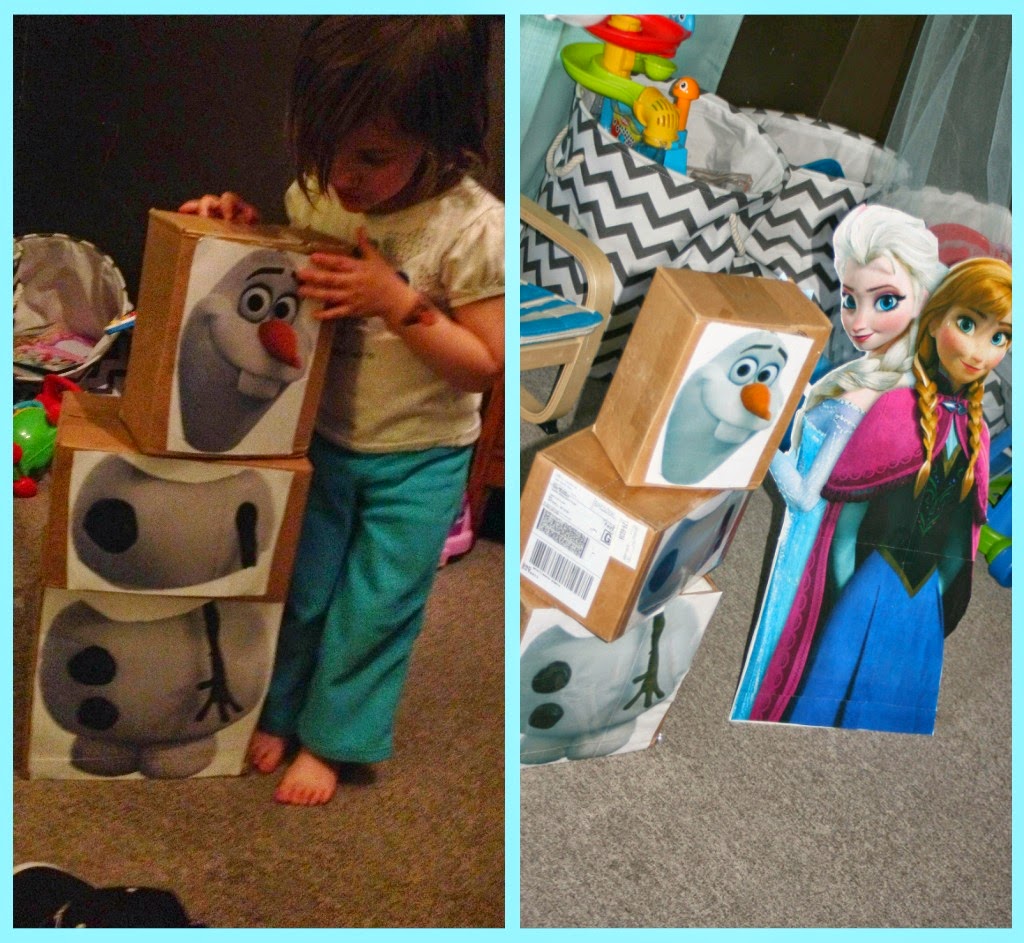
3. Olaf Cut Out

Find the Tutorial Here.
4. Cardboard Trees

Find the Tutorial Here.
5. Silhouette Signs & Banners

Find the Tutorial Here.
6. Snowflake Jars

Find the Tutorial Here.
7. Crowns & Antlers

Find the Printable and Tutorial Here.
8. Sidewalk Chalk

This is a super easy project and probably completely free. We did some terrible pictures (I am not an artist) and then some song lyrics. Big impact for some fun and, not going to lie..I love to play with sidewalk chalk!
9. DIY Snowflake Cake

I'm not baker...or cook. I was going to purchase a cake, but the store was all out of all Frozen related decorations. They didn't think they would get anything in for weeks. I decided I'd attempt to make my own. I ran across these Sugar Sheets in the Wilton cooking aisle. I used the same paper hole punch from other projects (after washing it) on the sheets and they worked great. Some white sprinkles and blue frosting made the cake work and my 4 year old was impressed even if I wasn't.
10. Olaf Bowling

The kiddos love this game, and it was super easy to make. You can either print out your Olaf (like I did) or get a Olaf poster from Wal-Mart and use the pieces to create a Olaf set. We had one of those smaller playground balls that made a perfect bowling ball.
11. Balloon Ceiling

This project was super simple. Each balloon got blown up with a penny inside (to weigh it down...marbles would work too) and a ribbon tied to it. Then I ran a string across the room every foot, securing with cup hooks. I went down the line tying each balloon's ribbon to the string. I used one large assorted pack of pearled balloons and a smaller bag of aqua balloons.
12. Tulle Ceiling

This one was hard to capture on camera. It looked much cooler in person. Using the same strategy that I used on the balloon ceiling. I ran a string from one side to the other side on each side of the room. I then draped tulle over the two strings. I used safety pins to secure the tulle to the string. Then I attached snowflakes to the tulle so there were snowflakes hanging from the ceiling throughout the room.
13. DIY Mugs

I found these coloring mugs at our local retailer. They included coloring pages, but that's no fun! I found various Frozen coloring pages online and used Word to edit them to fit the mugs. Everyone got to go home with their little Frozen mugs.
14. Tulle Door

This was a pretty easy project. A bolt of tulle (which is doubled over on the bolt) is the perfect width for a door. I looped the fabric around twice and secured with safety pins. I then used glitter ribbon to gather the curtain and then secured with a safety pin. You could also use this trick if you needed some privacy curtains in your house.
15. Coffee Filter Snowflakes

16. Fabric and Tulle Trees

This was a quick night before the party project. I have two tomato cages I use to wrap Christmas lights around at Christmas time. The Christmas lights were a bit hard to get to, so I grabbed some extra scrap fabric (Purple $1.00/yard fabric) and then put sparkly tulle ribbon on top of the fabric. I secured everything to the tomato cage with safety pins. (Are you starting to realize that I love safety pins?)
17. Tablecloth Backdrop

This project came from the necessity to cover up a huge pile of moving boxes. I took two 3M hooks I had sitting around and put them on the wall sideways. I strung a ribbon across the two hooks. I hung the tablecloth and used packing tape on the backside to secure the tablecloth. To spice things up I added some paper cut outs of snowflakes to the tablecloth. Great backdrop for our banner and table for just 1$!
18. Anna and Elsa Cut Out

19 & 20 Snowflake Confetti, Tablecloth Expansion, & Fake Snow

Since I had a snowflake paper punch, I had my husband cut a ton of snowflakes out of extra scrapbook paper I had sitting around. It made great confetti for the table.
Since we had quite a few kids joining us, we had to add a 6 foot folding table to our 6 foot dining room table. I put them right up to one another, but the 1 tablecloth I had obviously wasn't wide enough. My fix? That same 1$ a yard purple fabric. I cut it down the center and tucked the raw edges under the tablecloth. I secured everything together with fabric and safety pins. I had another piece of blue scrap fabric from my daughter's Elsa dress that became the table runner. If I had raw edges showing, I would pin it under and secure with a safety pin.
Finally, I created snow with the scraps left over from my coffee filter snowflakes. It's lighter than normal paper and makes great fake snow.


