Friday, February 28, 2014

Flashback Friday: DIY Roller Shade Curtains

Here's another oldie but a goodie! I will definitely reuse this idea when we move into our new home. Great way to get a high impact change on the cheap!

---
Hi Everyone!
If you have been reading my blog, you know that I have been talking about the dining room curtains for a while. Most of the time the post goes something like this, "Look at this cool project, please ignore the Hawaiian like fabric haphazardly hung on the windows."

I got the idea for my curtains from this tutorial by Cottage and Vine. I posted it as an idea thief a few months ago. Ever since then, I have been obsessed with the idea, but I was waiting for the right time to purchase the Amy Butler fabric I was in love with.
Cyber Monday was the perfect opportunity to buy this Wallflowers fabric from Hawthorn Threads. They were offering cheap shipping, and the price was a little less than normal.

So, I figured, I'll get some cheap roller shades from Lowes, have them cut to size, mount them and then put the fabric on. Easy project. Done in one Saturday.

Uh. No. Lets just say the score after this weekend was Blinds: 5 Me: 0.

I measured my windows several times. I went into the store. I explained my measurements, got the brackets to hold the blinds and went to hang them. Every single one was too big. (I had even had them cut on the small side for this reason!)

So, I got out my scissors and utility knife and cut them to the right size myself. Of course, this makes one side all hacked up and wonky. But I was covering it with fabric and didn't care. (although they all kinda hang crooked for this reason)

So, I try to put the brackets in. First, I use nails. However, the space is so small, I can't get a hammer into it. (and I was using a rather small hammer even)
I move on to screws. Of course, as is the case with the drill every single time I use it, I can't get enough pressure behind it, and I strip out the screws.
Enter husband. He just laughs at me and attempts to attach brackets. He starts cussing immediately because he also can not hang brackets.
We get brackets hung, but the newly cut shades are too short for placement of these brackets. And they are the wrong kind of brackets to move. Go to store to buy new brackets.

I'm too lazy to venture into the snow to get the ladder, so of course, I'm balancing on a folding chair. And course I fall down with a screw driver in my hand almost poking an eye out.
At this point I finally get all of the main shades hung. I'm one shade short, so I decided to skip Lowes for this round and head to Wal-Mart.

This is important. GO TO WAL-MART FIRST! They have the wonderful adjustable shades that you can just tear to the right size. You know how much easier those shades were? And they were half the price of the Lowes ones!

So, I am pretty excited about my easy Wal-mart shade. I get the brackets hung pretty easily, and I put up the shade. I realize that I have put the brackets on backwards. They work the way they are, but the shade will now roll under the top rather than over the top like the other shades in the room. Is this a big deal? To a normal person: probably not. To me, I knew if I looked at that shade I would be irritated for all time.

I decide to remove the brackets and switch them around to fix this problem. Except after I have them moved and drilled in, I notice that the way the brackets are, they can't be hung this way. So I have to move them back to the way they were. But now the holes aren't working with the screws (the holes are too big) So, I have to move to a new location. Which means the shade I already tore to the right width is now too narrow. I have to leave part of the pole sticking out without any shade. Whatever. I go to drill the brackets in the new location. However, now the stupid things won't drill in, and I've stripped two sets of screws. Husband comes in trying to help but leaves cussing about stupid cheap shades. I decide to grab a hammer and just use nails. That finally works.

After many many hours of this project, I'm ready to be done. I just have to attach the fabric with hot glue (very easy especially if you use some clamps to keep the fabric from shifting). I get all done with the fabric, I go to hang the final shade and......
I attached the fabric to the wrong side.
I just start laughing hysterically. Are you kidding me? Husband comes in to ask what is the matter (I'm sure he's figured shades have given me a nervous breakdown). I show him how I attached to the wrong side. He tells me to just attach more fabric to the opposite side. Except I only have a 5 x 10 inch patch of fabric left. He decides we're going to make it work. He jimmy rigs it up and hot glues it in place. So, for now, it's staying. Just enter our home cautiously if you use the door with the shade hot glued on.


This is the "After"
I


Share:

Wednesday, February 26, 2014

The Scare Factor: Old Houses

Hello!

Well it's been one crazy week. Seriously. I was suppose to take my bar exam...well today. I'm now sitting at my in-laws house. My husband's car broke down on Friday morning (the day I was scheduled to leave for the test). We couldn't track down a rental car due to a recent snow storm. Finally got one after driving two hours out of the way. Then, I got stuck in a hotel room during a snow storm and missed the start of the test. Thankfully I can transfer my test to next test date.


I do get to look at two houses tomorrow. One of the houses is kinda my soul-mate. I'm hoping when I see it in person, I will love it just as much.


My husband and I looked at houses previously and have had many long talks. We've looked into building or buying a new house. We decided after much talk that we are pretty sure we want to buy a historic home. Historic homes are beautiful. The natural wood work is one of kind. Craftsmen used to make moldings by hand and fit them together on site. The wood isn't even found anymore! A old home is one of a kind. There are generations that have lived there and raised families. Old houses are just love to me.


However, old houses can be scary investments! Once you Google "problems with old houses" you start to go down the rabbit hole of the "what ifs." What if there is bad electrical? What if there is still old plumbing? There are hundred different concerns. I thought I would share a simple 5 item check list when you're looking at a house. A good home inspection will help answer your questions and concerns, but this is a good checklist before you even get to that step. Now, don't completely walk away if you find a terrible problem. If the price is right and you've got a good team, you can deal with problems as they come up.


U.S. News has 5 questions to ask before buying an old house:

1. Is the foundation solid?

Old homes often have foundation issues, which are incredibly costly to fix. When you're looking at a historic home, leave the living room and bedrooms for last. The most important information you need to know is down in the basement. First, check the foundation for signs of cracks or shifting. Also detect and test for mold in the home, as it can be a sign of a weak foundation and other problems. You'll likely need to get a thorough home inspection service to tell you for sure if the foundation is solid, but if you see signs of crumbling or cracks then it's best to move on to the next house.

2. How old is the electric wiring?

Many old homes still have the original knob and tube wiring. Although it works, it can pose a fire hazard, especially in the attic (where it's likely to be covered in insulation). Evidence of the knob and tube wiring will be in the basement. If the home's wiring is outdated, then make sure you consider the cost of updating it. It's a huge, expensive job. I know, because I had to rewire my entire home after I bought it.

3. How old is the plumbing?

If the house still has the original cast-iron pipes, then you might need to replace them eventually because of mineral build up, corrosion, or leaks. Make sure you closely inspect any exposed pipes in the basement to see if they're in working order. Mineral buildup in the pipes won't be noticeable until you're trying to take a shower and realize that very little water is coming out. And if you're wondering, yes, I had to replace all my plumbing too. It wasn't fun.

4. How is the house heated?

Old radiators may add character, but they're an expensive way to heat the house. Make sure you carefully analyze how much fuel oil you'll need to heat the house and stay warm in the winter. If the home has central heat, then check to see how old the furnace is. This is another expensive replacement.

5. How's the roof?

Replacing a roof is one of the most expensive home repairs you'll make. I replaced mine recently, and I could have taken a plush Euro-vacation on what I spent. Make sure you check the roof and the attic carefully for leaks. If the roof is more than 10 to 15 years old, then realize you might need to replace it sometime during your ownership of the house. This is another potential cost you need to tack on.

Hopefully my search tomorrow will prove that the house I love is in good shape and give me a little more peace of mind...at least until I have the house checked for lead.


Share:

Friday, February 14, 2014

Flashback Friday: DIY Chevron Bookcase

One of my favorite projects. The bookcase was from my grandmother's garage (it was holding tools), and we added a new back. Once chevron is out (which must be coming soon, right?!), the back isn't original and can be changed to something else.

Hello Everyone!

I have a fun project to share with you today! I got a pretty bookcase from my grandmother a few weeks ago. It was sitting in her garage, but it used to belong to her mother. She asked if I wanted it and I said sure! It needed some serious TLC. The paint was chipping. There was some sort of can of mineral spirits or something that had placed on the top and made the paint bubble on the top. The back had been replaced and wasn't painted.

So. Here's the "Before"


and the "After"


So, here's how I revamped the bookcase to something fantastic. The entire process took two days working for two hours.

Chevron Bookcase

Supplies:

Sandpaper (60 grit. My sander died and I had to use a block hand sander. So I used a rougher grit than normal)
Paint: White Enamel By Krylon, Yellow Sunshine by Better Homes & Gardens
Blue Painter's Tape
Tape Measure
Pencil

Directions:

Step One: Sand

You will want to sand enough to get out the surface scratches and to make a nice rough surface for the paint to stick. Now, this bookshelf is old...at least old enough to belong to my great-grandmother. There's a good chance that there was lead paint on it. So wear a mask and have good ventilation. Wash and dust the bookcase after you sand it.

Step Two: Paint Your Base Coat

I started out and painted everything with the white enamel paint. I ended up doing two coats. This paint is supposed to be low odor. Which is definitely not the case. I ended up opening up all the windows.

I used a paint pad instead of a paint roller this time and I loved it. It covers thicker and faster than a roller. I might be a convert...at least when it comes to furniture.

Make sure you let this coat dry before starting to tape!


Bookcase all painted and ready for tape.

Step Three: Tape...and Tape...and Tape

So, this is where the tutorial really gets tricky. I did a lot of reading before starting my process and I learned somethings I didn't read about.

First of all. To do my design I did not use a cardboard cut out of the design, which most websites do. If I had, I might have a more precise design but I didn't care if it was completely perfect since it was in the back of the bookcase. I just wanted a fast method. I didn't find a complete tutorial on how to just use painters tape.

This is what I did and it worked pretty good.

The 6 inch Painter's Tape Method.
(I'm claiming this method as my own since I made it up on the fly!)

First of all, I cut all my blue painters tape 6 inches long.


Taping my design. Using my 6 inch precut tape method.

Then, after cutting my tape, I measured 3.5 inches from the top of the bookcase. I did a light pencil line all the way across the top. You can erase the pencil afterwards, or leave it. You will be painting over it.

After measuring the line, I used that as a guide for all my points of the zig zag. I did a (very) rough sketch of it here:


(Click to enlarge)

After doing the first row of tape, I just measured down 3.5 inches from each point and did a little pencil line. I then used those marks as a guide to do my second row. Since all the tape is cut the same, it just be pretty easy to make a uniform design. You will want to make sure you keep the points in line vertical.

Another rough draft to give you the visual:


(Click to enlarge)

You should now be able to do the entire design continuing to mark 3.5 inches from the point in the row above it. The process goes pretty quick once you start if you pre-cut all your tape.


Taping done and ready for yellow paint.

Step Four: Paint Yellow & Touch Up

Now, I'm not exactly sure how you can do this without having to go back and do some touch up. I tried all the tips I found to prevent bleed and they didn't seem to work. I pressed the tape down with my fingernail. I also took the tape off while the paint was still wet. So, be prepared to wait for the yellow to dry then go back and touch up the lines with some white using a nice art brush.

So, I did was one coat, let it dry. Then I did a second coat but then I pulled the tape off while it was still wet. This was supposed to help bleeding, but it didn't do the trick completely.

Step Five: You're Done!

Let your paint dry & enjoy your new fantastic new bookcase!


My insulator tealight holders with springs.


Share:

Happy Valentine's Day!

Happy Valentine's Day!


I know some people loathe the holiday, but I take the day as a reminder to show those around you love and compassion. Give extra hugs and kisses to those around you today. Well...except strangers and other people's spouses. I don't want you to be assaulted or sued or something.


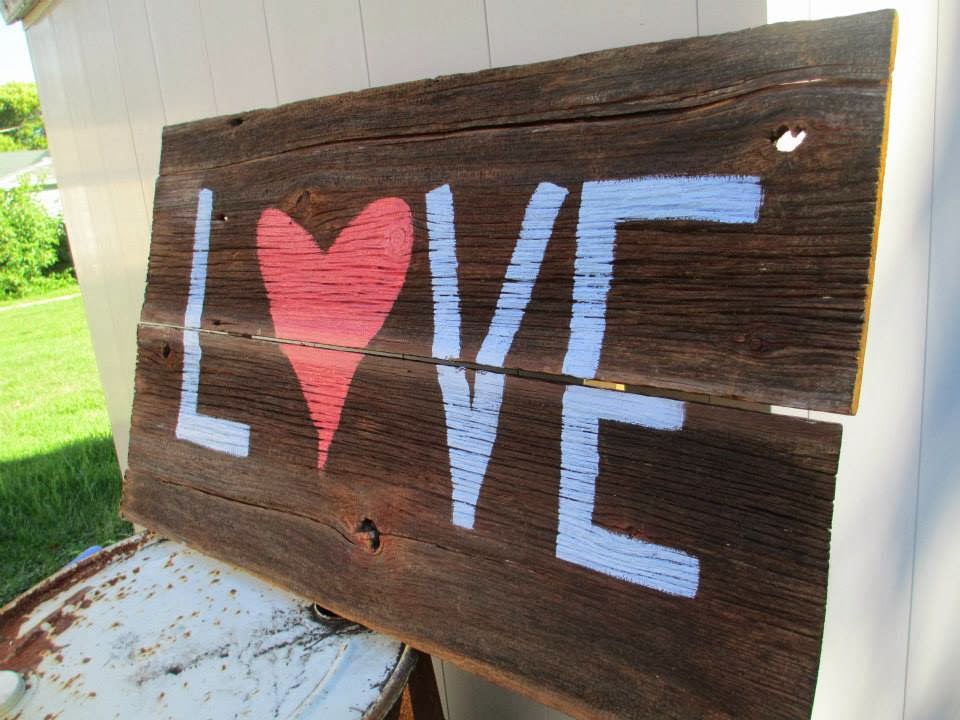
Great gift idea for Valentine's Day! Authentic barn wood wall hanging. Purchase on my Facebook page!


Share:

Thursday, February 13, 2014

House Fires: Call to Action, My Experience and Tips for Your Family


Call to Action 

This past week a very sweet woman I went to high school with lost her home to a house fire. She also a fellow blogger with a new blog about her family’s adventure of buying and living on a ranch in Montana (Check out The Montana Ranch Adventure here). There is a relief effort going on right now to help her family. Please visit their Relief page here if you have a moment to donate or at least give some support to a family going through a shocking hard time right now. I can't imagine what it's like to have two young kids and have a house fire, and their family is my thoughts today.

My Experience


Four years and two months ago, I was in a similar less severe situation. I was pregnant with my first child and back home visiting my parents for the holiday. My husband and I were at my parent’s home while they were both at work. We heard a sudden banging on the front door. The dogs went crazy, and I was irritated because no one we knew ever uses the front door. Must be someone trying to sell something.

Once I figured out how to open the door, I saw a complete stranger on the door step. She immediately bursts out “Your house is on fire, you need to get out now!” I couldn’t comprehend the words coming out of her mouth. I must have looked puzzled because she repeated herself. I decided to go outside and take a look myself. Sure enough, the roof of my house was engulfed in flames. My husband comes upstairs (since the dogs were still going crazy) and I yell at him, “Call 911.” He looks at me like I’m crazy and says “I don’t know your parent’s address!” All the while this stranger can’t understand why we aren’t leaving the burning house. “I’ve already called 911! You need to get out!”

I hadn’t been in an emergency situation before, and I now know that I don’t react particularly well. I don’t panic or get hysterical or anything, I just shut down. I found myself standing around trying to comprehend what was going on. Thankfully my husband is a thinker and do-er in that type of situation, and he immediately got the dogs in our car, grabbed a couple of items and started moving vehicles so the fire trucks would have a clear street to set up on. We were also blessed that our neighbors happen to be home, and they are a family of firefighters and EMT’s. They immediately took control of the situation and got keys to move cars (including my dad’s prized anniversary edition Camaro) and told me exactly what I needed to do. As I was trying to find the Camaro keys (took me a while because I wasn’t allowed to drive it!), my mom came home from work. The fire happened right around 5:00 pm, and my mom even pulled over for the fire trucks on her way home. The first thing she said when she got to the scene and came inside was, “What did you do?!?” Today we can laugh about what a ridiculous statement that was. If I had been with it, I probably would have answered, “Shooting fireworks at the roof.”

My dad was at a work function. The ironic thing is he was/is an EMT and if had his pager turned up, he would have heard the call go out for a structure fire at his own address. My mom called him and yelled “The house is on fire.” and hung up. (How would you like to get that call?) He arrived as the fire trucks were unloading hoses and the like. He was immediately concerned to see if I had closed the fire safe (no) or grabbed any documents (no). He is a do-er as well and immediately had people on the phone. My mom asked if I had grabbed the family photo albums (also a no). I was on all sorts of medication for my pregnancy (blood thinners, insulin etc.), and I hadn’t even grabbed that.

As the firefighters got to work on our house, I stood across the street by our neighbor’s tree. That was important as I’ll get to below. The fire hydrant was frozen, so there was no water for the hoses. The firefighters were forced to use a foam substance on our house. That turned out to be our house’s saving grace. There was no water damage to worry about once the fire was put out.

As we and all our neighbors stood there watching our house burn, it was pretty silent. Silence was not golden. Our smoke detectors had yet to go off. There was smoke in the house prior to the neighbor coming to the door to warn us, but we hadn’t thought much of it. My parents had a wood burning fireplace my husband and I had been using that day so we rationalized the smoke being from the fireplace. I did say to my husband about 20 minutes before the knock on the door that the house was too smoky, and my dad was going to be mad. I had opened a couple of windows and went about my business.
My childhood bedroom. The fire started right above this room.
My old bedroom.
A mess, but no substantial water damage.
The fire started in the attic. Temporary roof already up.
Ground Zero. Temporary roof already up.
One of the firefighters on the roof ended up falling through the roof into my parent’s bedroom (on to their 2 day old bed that was an early Christmas present). Once that happened, the smoke detectors went off. They are quite loud. We could hear them clearly across the street. The firefighters of Spearfish did an amazing job, and got the fire put out. The roof was a wreck, several rooms were ruined, but they saved most of the house and our neighbor’s house. We were very lucky.

It was two days before Christmas, and we had to spend the holiday in a hotel. There was also a huge blizzard the next day after the fire. The snow was so bad, we could barely get food and that was only if we found a store open. We had our Christmas dinner at the ambulance barn. A group of very nice people really made the experience a bit less terrible. The firefighters got us a new Christmas tree. The professional cleaning service picked up our Christmas presents and put them in the ozone machine to get rid of the smoke smell even though they had their own families to attend to. A tarp got put on the roof right away. Co-workers of my parents chipped in to get my family the essentials. The hotel got my parents a suite that was like an apartment. My parents’ friend and neighbor opened her basement up so my parents had somewhere to live while they rebuilt. Several several months later, the house was done and ready to be moved back into. Things were replaced and irreplaceable things were salvaged. The luck of the fire hydrant freezing meant my family’s photographs sitting in the room below the most fire damaged room were saved.
Our replacement Christmas tree in our hotel room.
The snow storm that hit a just a couple of days after the fire.
Just a little bit of snow to move to get to the house.
The investigation found that when previous owners had put insulation in they hadn’t left enough space between the chimney and the insulation. The insulation had slowly started smoldering until it eventually started on fire. We were again lucky that it happened when people could see and warn us of the danger. If it had been at night, it could have been a long time before the smoke detectors woke us up.

Preparation Tips For Your Family


Growing up my dad had been a preparation nut. I remember being very little (around 5) when my dad started running drills with us. He had videos for us to watch about house fires and talked about the plan if there was a fire. We practiced those plans often. That training was essential. When my dad came on scene, I was sitting in front of the neighbor’s tree. That tree had been our family meeting place when we talked about our house fire plans. It had been over 10 years since we had talked about that plan, but since we had run drills and talked about it so much, it was routine. Even though I was completely zoned out, it was engrained in me to follow the plan. The problem with situations like house fires is if you are never put in that situation, you don’t know how you’ll react. I didn’t know that I would go completely blank. It’s important to have a plan in place.

According to the National Fire Prevention Association, only 1 of every 3 households have developed and practiced a home fire escape plan. 71% of Americans have a plan in place but only 47% of those have practiced it. You could have less than 6 minutes to get out of a house before it becomes life threatening.

The NFPA has a great tip sheet on creating an escape plan. 

  • Make an escape plan. Draw a map of your home showing all doors and windows and discuss the plan with everyone in your home.

  • Know two ways to get out of every room if possible.

  • Have an outside meeting place a safe distance from the home.

  • Practice the fire drill at night and during the day, twice a year. My dad would test the smoke detectors after we went to bed so we heard the noise to wake us up.

  • When you practice, use different routes to get out of the house.

  • Teach children how to escape on their own in case you can’t help them. (I struggle with this with my children. I worry about them being so young and helpless.)

  • Close doors behind you as you leave.

  • If you hear a smoke alarm go off, get out and stay out. (I’m talk to you dear husband who went back into the burning house to grab stuff.)

  • If you have to escape through smoke, get low and go under the smoke.

  • Call the fire department from outside your home (I didn’t follow this rule myself in my daze.)

In our situation, the smoke detectors didn’t go off until long after the fire had been burning. 2/3 of home fire deaths occur where there is no smoke alarms at all or they aren’t working. Working smoke alarms cut the risk of dying in a house fire by half.


  • Install smoke alarms in every bedroom, outside each sleeping area and on every level of the home including the basement. My dad was very careful about making sure we had working smoke detectors in our home growing up, but we didn’t have one in the attic. It’s important to have a system in your attic!

  • Larger homes may need additional smoke alarms to provide enough protection

  • For best protection, interconnect all smoke alarms so when one sounds they all sound. This is what my parents did when they rebuilt. All smoke alarms were interconnected. Yes, at times it was annoying like when my mom cooked, but they are worth the extra hassle.

  • An ionization smoke alarm is generally more responsive to flaming fires and a photoelectric smoke alarm is generally more responsive to smoldering fires (like the one in our attic). For the best protection, both types of alarms or combination ionization and photoelectric alarms (also known as duel sensor alarms) are recommended.

  • Smoke alarms should be installed away from the kitchen to prevent false alarms. Generally, they should be 10 feet from a cooking appliance.

  • Replace all smoke alarms when they are 10 years old.
All information provided by the National Fire Prevention Association’s Public Education Division.


Fire prevention isn’t something most people think about day to day. Even after living through a house fire, I find myself slacking on checking alarms and creating an escape plan. It’s a hard thing to live through, but making sure you're prepared can help keep your family safe in an emergency.


Share:

Coming Soon: The Deep Discount Destash

Hey Iowans!

If you haven't read the billion of posts, I'm going to be moving out of state in a few months. That means moving, and moving is just about as much fun as childbirth. So, I'm going to try to unload some of my inventory and personal furniture items that I have refinished. Since I want to move things quickly (although part of me wants to keep everything), it's a perfect time to pick up some items at discounted prices!


As always Facebook followers get first dibs before the sale goes public. Make sure you follow my Facebook page!


Share:
Blogger Template Created by pipdig