Electric fireplaces are trending in the world of DIY. I'm going to share how we built our setup and try to give tips on planning your own fireplace built-ins.
This idea certainly isn't new. It's been going around Pinterest for maybe a year or so. I saw the idea originally on
Nesting with Grace (a fantastic home decor account to follow) and decided to really go for it in our new home. Our home is beautiful, but it's lacking some custom cozy touches. I thought a huge statement piece in our living room would be a good place to start. Plus the idea of sitting by a fire watching snowfall on the lake sold me.
The first thing you're probably wondering is why we didn't just get a gas fireplace put in when we built our house. It was certainly an option. However, it was a 30k option. I like fireplaces and all, but not for that price tag. Electric fireplaces have really come a long way from a picture on a screen. Even a top-of-the-line one with real sound and heat will be substantially less than the gas fireplace quote we were given.
I can't give you exact measurements on what to do with your fireplace setup because the piece has to be built specifically for the space you have. However, I can explain how we came to our measurements.
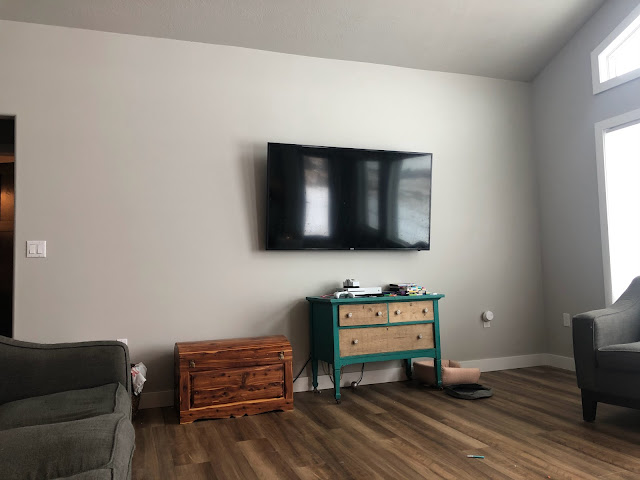
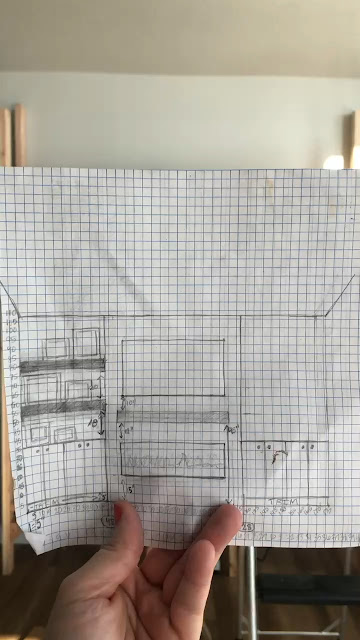
Graph paper is your best friend. I start all my projects on graph paper (or on the iPad with a graph notebook page and my iPad pen). Measure out your space. To determine the size of the fireplace, I measured our TV. My husband is not going to part with his big TV. I went fireplace shopping online. I found a fireplace that was slightly bigger than the giant TV. I graphed out a fireplace surround that was about 6 inches bigger on each side of the fireplace. The mantle is about two inches wider than the fireplace.
Once I knew how big the fireplace was going to be, I had to decide on the cabinetry around the fireplace. I knew I wanted narrow-depth cabinets so the fireplace stuck out further but wasn't too far into the room. I looked at pieces of individual furniture like a credenza or hutch. (Faux Farmhouse has a piece that's built-in, but looks like a piece of furniture and it's beautiful) In the end, upper cabinets were the ticket. I could get stock upper cabinets in white from Home Depot that were almost exactly the correct size. I have small filler pieces to make them perfect, but it very close to the perfect measurement. Four 24 inch uppers were ordered and shipped to our local store. I did this early on because it's was a month lead time at the time. That was back before COVID. Now you might be waiting much longer.
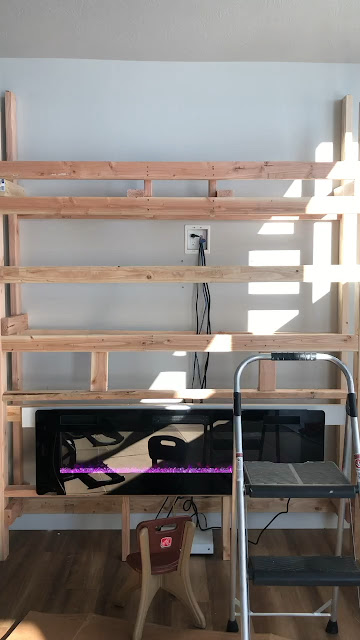
My husband went to work building the 2x4 framework for the TV and fireplace. You have to frame out the fireplace box and supports for the TV. He also worked in a "secret" door on the side so if we need to plug or unplug wires, we're able to get access behind the fireplace. The secret door is simply held in place with a sliding lock. One thing I would change about this project is the space behind the fireplace. It is VERY narrow. My husband can fit (barely) and the children can. I would probably add a couple of inches if I did it again. This framework was attached to the ceiling and wall studs and is SOLID.
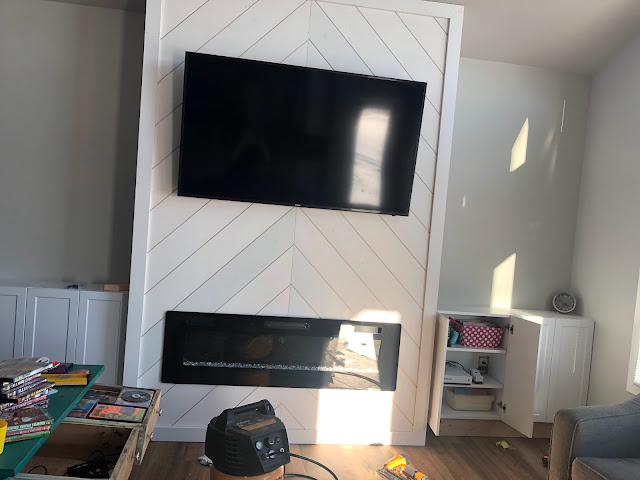
Once the framework was done, the fireplace is attached to the framework. My husband added a whole lotta shiplap. Shiplap is definitely a trendy thing right now, but you could easily use plywood and then add brick or stone if that's more your jam. I wanted something dramatic so the shiplap cut on an angle was perfect.
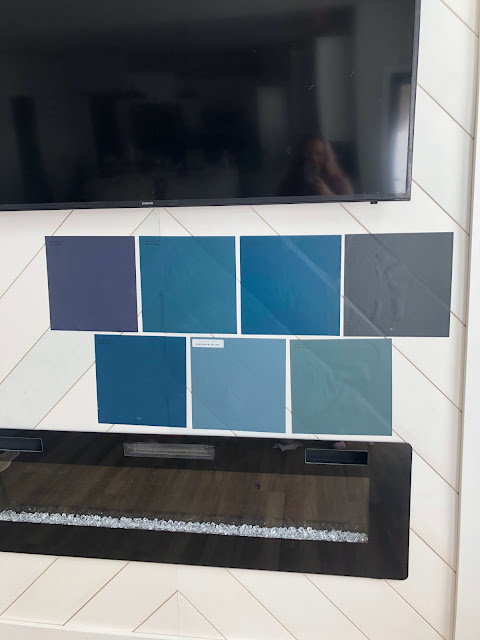
I used a company called
Samplize to get paint sample sheets for the fireplace. I loved this service. I imagine for walls it's even more convenient because you can move the sample around the room and sample different lighting situations.
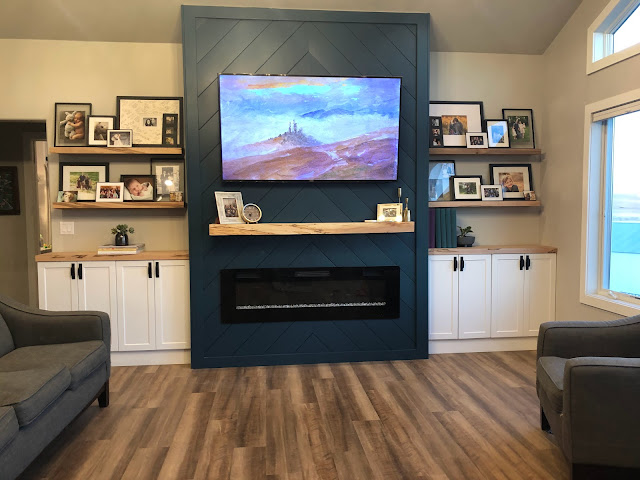
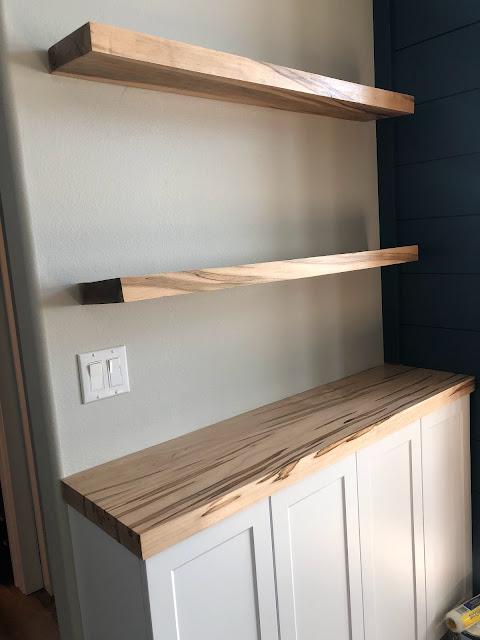
Once the fireplace was painted and the cabinets installed, it was time to add in a mantle and floating shelves. We are a handy family and my husband created the mantle and floating shelves using solid slabs of ambrosia maple (the floating shelves) and spalted maple (the mantle). They are attached to the walls using metal rods welded to a metal bar.
I finished them with a new product. The name of it is and it's a poly wax hybrid finish. I used a matte finish because I wanted the wood to look raw without actually being raw. My kids will definitely leave wet cups on it, and I wanted to avoid watermarks. I liked the product. It did slightly change the color of the wood, but it was definitely better than poly. Overall we've lived with the fireplace for over a year now and don't have any complaints. I've upgraded to a Frame TV which is the perfect piece over a fireplace and the electric fireplace does a great job putting out heat on cold evenings.