Sunday, April 26, 2015

DIY Sunday: No Sew Burlap Garden Flag

Happy Weekend Y'all!

I'm writing this fairly late at night and scheduling it for tomorrow. We have a full day of activity on Ugly House planned tomorrow, but I can't seem to sleep. I blame my allergy medicine. Yay Spring!

Tomorrow we're tackling the landscaping of Ugly House. I enjoy all things DIY, but I can honestly say that landscaping is one thing I don't particularly enjoy. I love the result of a good landscaping job, but I don't seem to have the vision for it. I have been pinning like mad trying to steal ideas from people more creative than me.

One thing I did update with the new spring weather was our garden flag at the entrance to our property. I had the Christmas one hanging up until, well, last week. That's pretty sad. Being someone who likes things a bit more modern vintage, garden flags aren't really my thing. But I found one modern beautiful Christmas one and decided to jump on the wagon.

The problem is that I can't keep the nice Christmas one up year round. Well I suppose I could. There's no one policing long expired Christmas decorations. Nonetheless, I decided I needed something that was more universal and could stay up until next Christmas. I looked at the area stores and nothing matched my style. I started looking at tutorials on Pinterest, but no one could seem to explain how to keep the paint from running in the rain.

So, I decided to just try it out and see how it worked. I am happy to report that my method has survived four rain storms, so I think it worked! Best part is it's completely sewing free.


DIY No Sew Garden Flag
Supplies

Burlap. I used left over burlap table runners from the recent teddy bear baby shower.
Paint. I used left over latex paint. Acrylic would also work.
Mod Podge The best option would be outdoor Mod Podge; however, I had some matte Mod Podge and it worked fine. 
Safety Pins (Optional)
Scissors
Paint Brushes

Directions

1. Cut Out Your Flag

I used another garden flag as a template on how large I wanted the flag. My flag was the same width as the burlap table runner fabric I had (12 inches) and the length was approximately 14 inches at the longest part. I decided to do an angled cut at the bottom. Keep in mind, I folded over my fabric so there was a pocket on top. Therefore the final cuts were 12 inches wide and 28 inches long.

2. Paint Your Design

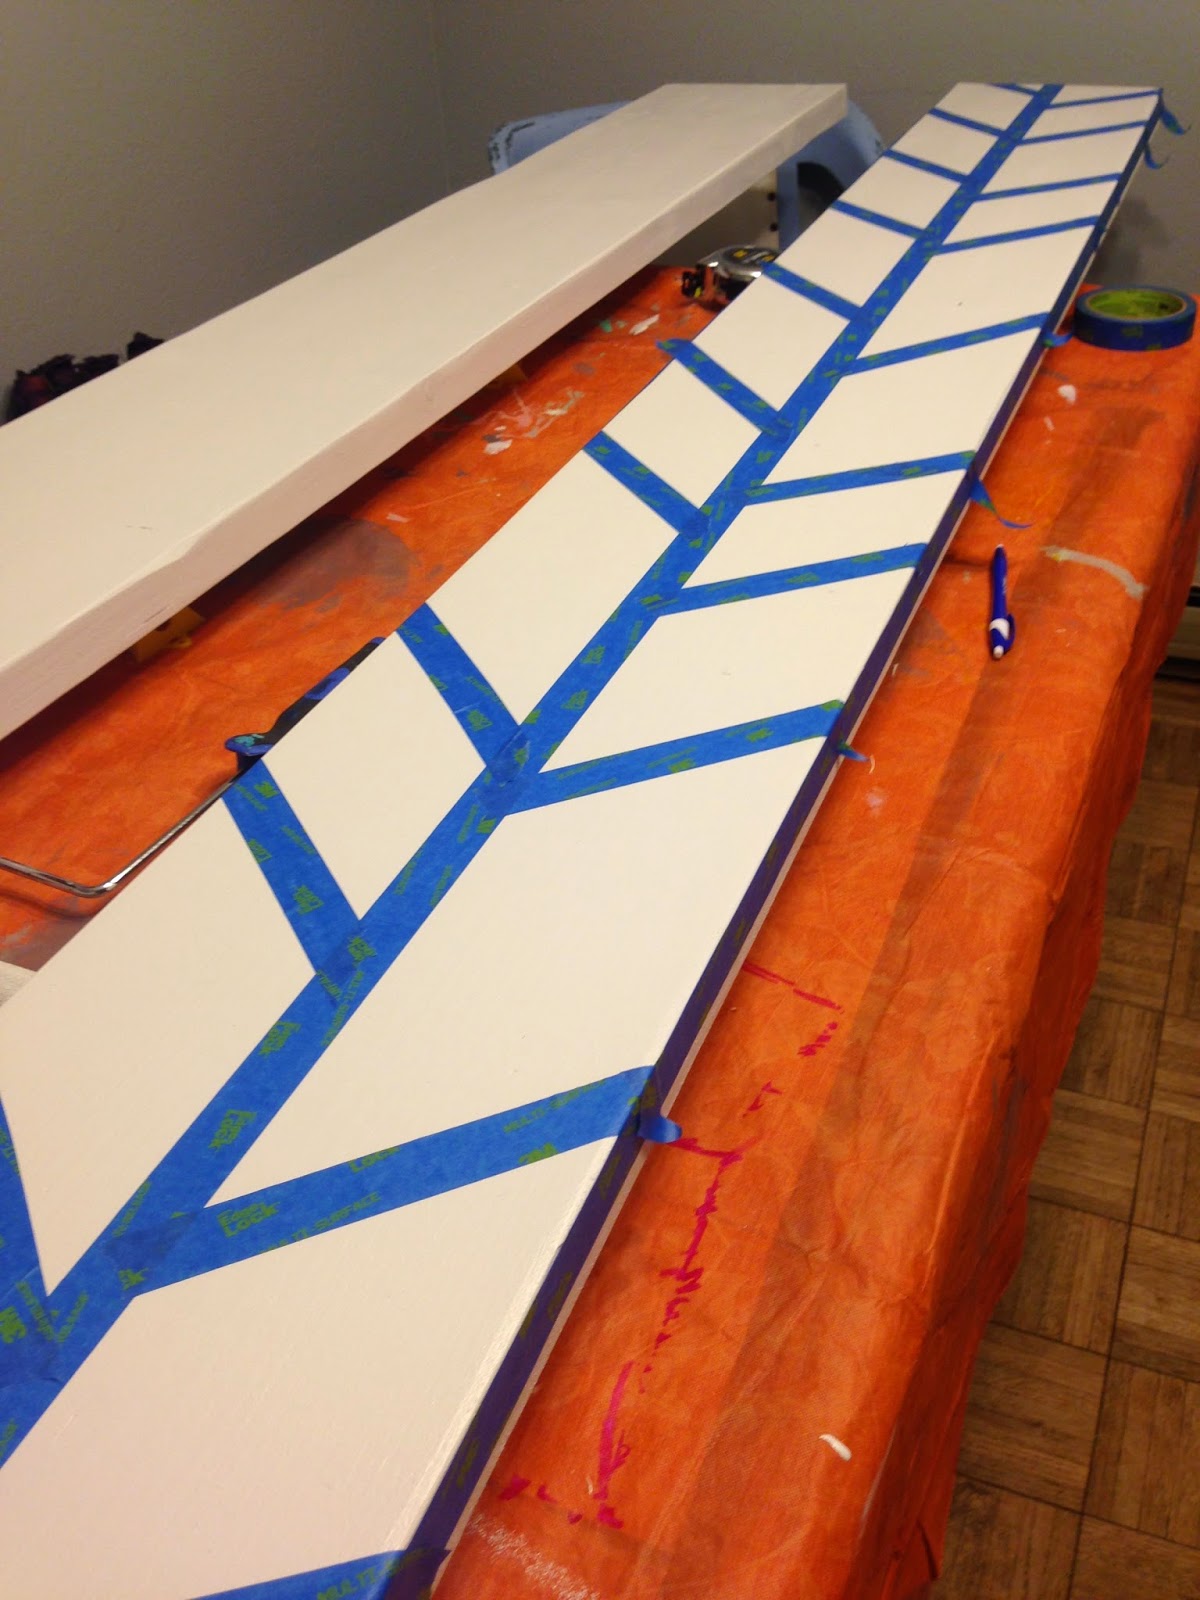
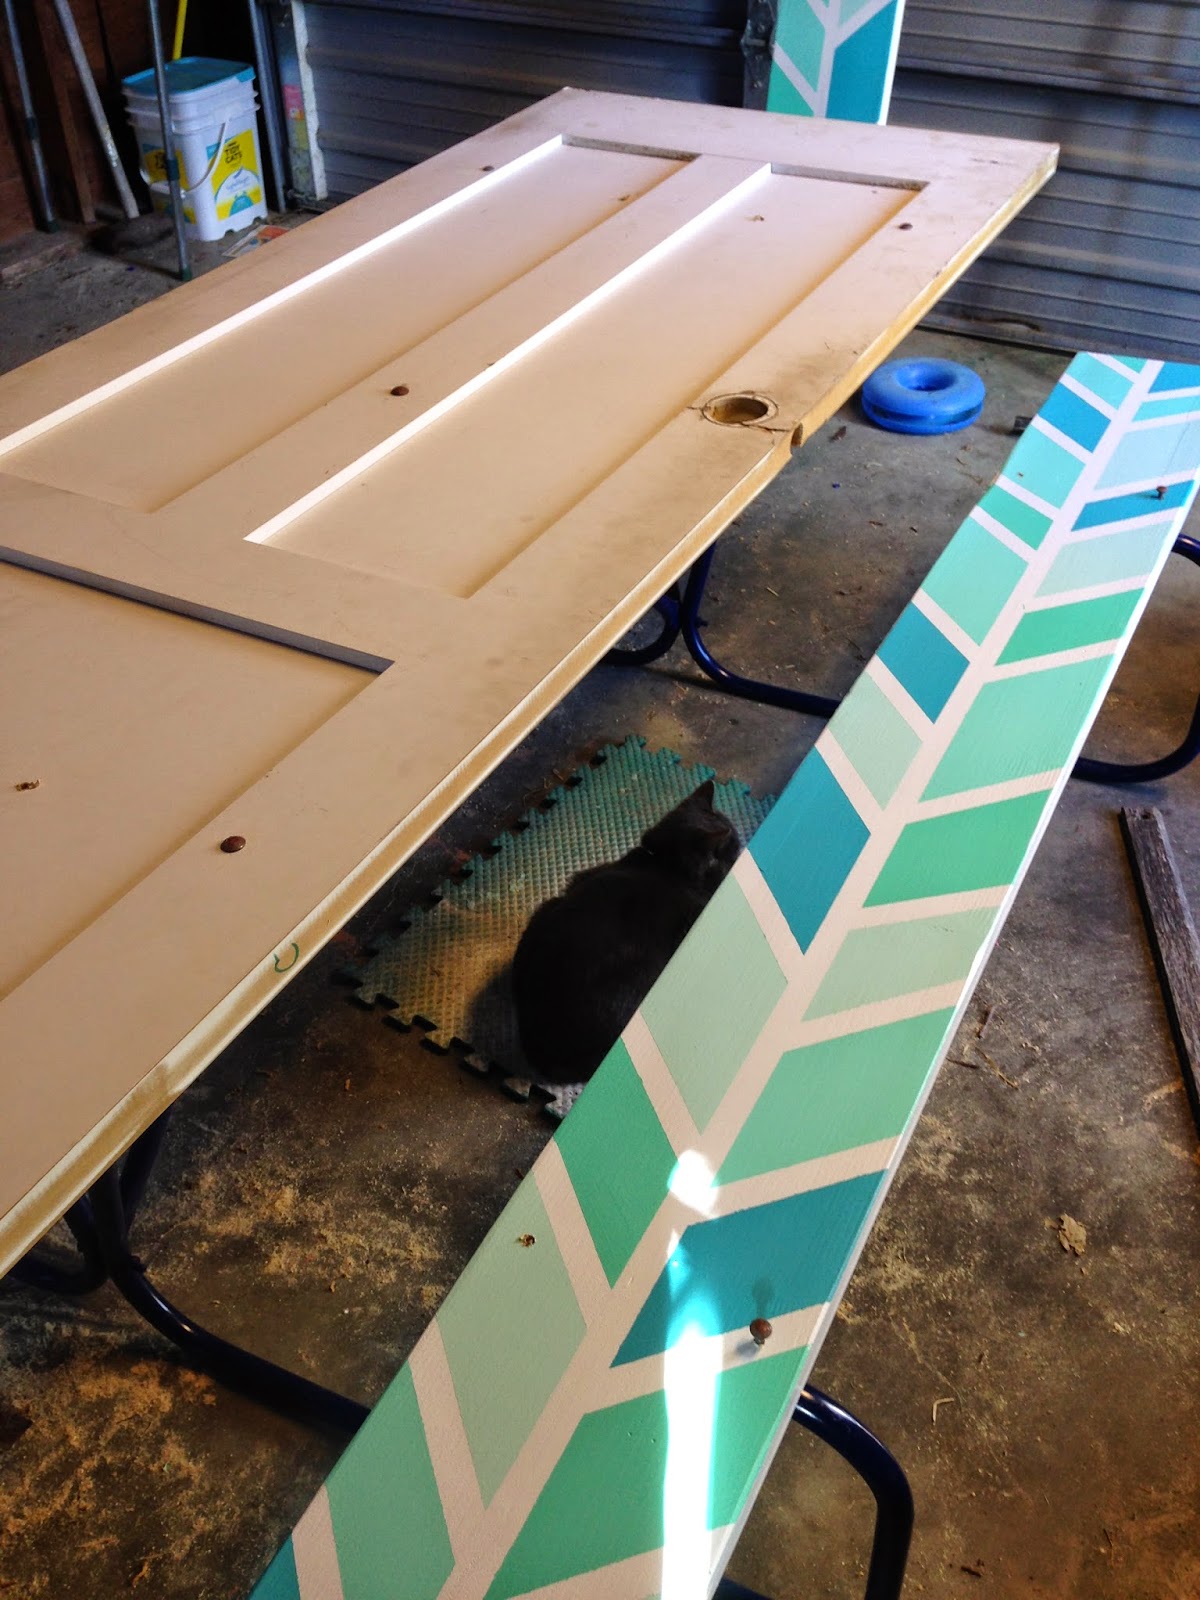
I free handed my design. You could also print a design and use carbon paper to trace it onto your fabric. If you're getting really crazy, you could create a stencil with vinyl or freezer paper. I made sure I had plastic underneath the burlap and then started. I did the background chevron design first, let the burlap dry and then did the initial on top. The blurred out portion is my address. Not that I don't like visitors, but I think one or two people I don't know might actually read this blog. And my Westie isn't much for strangers. Just ask all the fallen bunnies and snakes. RIP

I started out with just doing one color on the initial and address. I decided I didn't like that and did a outline in a yellow to make the paint pop. Let all the paint dry completely before moving on to the next step.


3. Seal Everything

This was the step I couldn't find more information on. How do you keep the paint from just running everywhere when it rained? You could try a clear coat of spray paint. I didn't have that on hand, but I did have Mod Podge. I decided that worked great for my coasters, so it should hold up pretty well in the elements. I'm happy to say that we got a couple days of rain and it is still looking like day one. Using a paint brush/sponge brush, do a nice heavy coat of Mod Podge. It looks a bit scary at first, but it will dry clear.


4. Dry Over Night & Hang

Let everything dry before you put it outside. The nice thing about the Mod Podge is that it's an adhesive, so it's going to glue the two layers (front and back) together. I took two safety pins and put them right below the "pocket" where the flag pole goes. That will be my back up if the two layers become unglued after sitting out in the elements. I also always use a large safety pin from the side of the flag to the pole because I kept losing my flags in the South Dakota wind. You could also add ribbon or flower accents to your flag if you want to get really fancy.


Share:

Tuesday, April 21, 2015

Show & Tell: Silhouette Vinyl on Vintage Window

Hello!

We finally picked up our last moving boxes from my mother-in-law's house. Now we just need to find a place for the couple of boxes that remain at my parents, and we're finally unpacked. It only has taken a year. I think I'd rather go through childbirth before I would move again, and that was 30 hours of pure torture with my daughter. A fact I will remind her of constantly when she is a teenager rolling her eyes at me or maybe later today. She is a 4 year old going on 16.

One of the last items I unpacked was a stained glass window. I had it hanging in our bedroom at our old house. While I love vintage items, this window has an even more special meaning. The stained glass is from our first home together when we got married. I loved that little 900 square foot home. It had a fun orange kitchen, huge backyard and tulips that came up every spring.

When I first put the window up, I had cut a vinyl with my husband's favorite bible verse. The verse was his confirmation verse. If I remember correctly, he also wrote it on the bottom of his wrestling shoes the year he won state. However, I cut the vinyl too small and it was pretty plain. I have learned a thing or two since I got my Silhouette and one of those things is if you can find the right design, it's worth the $0.99 to just purchase it rather than attempt to create it on your own. While I like to think of myself as creative, I am not an artist by any means. I'll leave the graphic design to the experts.

When I went to put on the new design yesterday, I noticed my beloved window was shedding paint chips everywhere. The layers of latex paint were flaking. That's to be expected on such an old window. I decided to take a razor blade to the window to remove the chipped paint. The look actually makes the window look more salvaged (if that’s a thing). I like how the blue, cream and white came out once I got the loose paint off. I hung up the window up where my someday beautiful window will go. Someday...


Share:

Friday, April 17, 2015

Gone Junkin': DIY Picnic Table Upcycle

Happy Friday!

I'm SO happy it's the weekend. It's 8:00 pm and still 70 degrees out. I'm loving that it's so nice out. It's made enjoying my new project much easier.

Like the bench I featured a couple of weeks ago (Click here for the post), we had a old beat up picnic table left over by the previous owner of our acreage.

I knew it could be fixed with some new wood. I decided I wanted to take it a step further and make it even more functional. This is how our drab junk picnic table became our upcycled game table!


Supplies

Free Picnic Table (Or purchase the metal legs) $0.00
Old Door $35.00 from Habitat for Humanity. You probably could find one for free. I just wasn't patient enough!
Spray Paint $3.00 On clearance at Wal-Mart
Latex Paint $0.00 I used sample pots I got for free from Lowes.
Varnish $10.00 Pint size from Lowes.
Wood $5.00 I bought untreated wood for the seats after speaking with an employee at Lowe's. I just sealed it with extra coats of varnish. This way I didn't have to let the wood season over the summer.
Yahtzee and Sorry game board $10.00. I couldn't find a used one, so I ended up purchasing a brand new one for the project. I chose Sorry since it's a game that can be played across a large spectrum of ages. I had some Yahtzee score cards. I laminated each card prior to epoxy.
Epoxy $35.00. This was the expensive part. If I redid this, I would probably just get plexiglass cut to size and seal it to the table.

Total Cost: $95.00
Cost of a smaller new unfinished picnic table: $100.00

Directions
1. Take the Table Apart & Spray Paint


I reused all the bolts and nuts on the table for the most part. They entire thing came apart quite easy. I imagine if it would have given me some grief, I would have taken a hack saw to it or a sledge hammer. I cleaned up the legs with some steel wool and a wire brush. It had some rust, but I just had to get all loose pieces off and then it was ready for a coat of spray paint.

2. Cut Seats to Size & Paint. Paint Door.


I had to take a foot off each board. After the board was cut, I primed all sides and did a base coat of white. Then, I did a design with painters tape and painted the tops of each seat. Note that the sealer will yellow the color, so white may not be the best option. If I redid the project, I would probably pick a darker color to avoid this. I also had a white door. I did a fresh coat of white on the door so it would look cleaner.


3. Drill Holes. Attach Door & Seats.


So this is a case of measuring twice and drilling once. I kept the wood I took off the picnic table and used that as a template on where to drill each hole. You may also notice the door knob hole on this door is looking pretty beat up. The door was apparently build around the door knob. It would NOT come off. We finally took a hammer and just beat the heck out of it until it popped off. The damage ended up being covered up anyways, but it is still sad looking here.

4. Seal Seats & Door

I don't have a picture of this step, but it's pretty darn simple. Follow the directions on your varnish to seal everything. I did bottoms and tops. I went over screws as well. You could easily seal everything before you bolted it into place, but I wanted everything to be sealed together as one piece.

5. Epoxy Time!


This is a matter of following the directions on the epoxy you chose to use. I used "Glaze Coat" found in the paint section of Lowe's. It worked very well; however, it's not rated for outdoor use. I am curious to see how it will do this summer and winter. The other option I thought of after I had everything done was plexiglass. That would have probably created a cleaner look. I had some serious issues with keeping bugs out of the epoxy as it dried. I pulled the table into our garage, but it still was a bug magnet. I also would have done a fun color or design on the Yahtzee card side if I redid everything. That would have made the bug spots less noticeable.


Bubbles are normal when you first pour the epoxy. Use a heat gun or plumber's torch to heat the surface and make them disappear.


The game board turned out great. Yahtzee side...err not as great. Stupid bugs.

6. Dry & Enjoy!

The epoxy will take some time to dry and harden. My epoxy took about two days with 70 degree weather. There's still one very small tacky part, but it will be gone soon.

Side Note: I also cut two pieces of scrap wood to put over the knob hole. You'll see below that they make a great hiding spot for game pieces! I'm attaching the top wood with velcro.


 The epoxy looks like glass. It makes it so the door is all one level. There's no insert to worry about.


Bug spots! BOO! That was a HUGE moth that landed.

The knob hole is perfect place for the dice for Yahtzee! I still need to do some clean up on the lid and another coat of paint, but it will be a fun part of the table when it's done.


 A great addition to the Ugly House yard!


Share:

Wednesday, April 15, 2015

Show & Tell: The $40.00 Playground

Good Morning!

It's a wonderful day here in the midwest. The sun is shining. Birds are chirping. The wind is howling. Well, maybe that last party isn't wonderful, but it's par for the course living in South Dakota.

Sunday was a day of outside family time. We have been busying every weekend over the past month, and yesterday was a day to just hangout and enjoy the weather. I get bored pretty easy, so I decided to tackle a couple of projects.


Speaking of getting bored easy, like many children, my kids have inherited this trait. They do pretty good using their imaginations. In fact, as I was working on this project, they decided to take some scrap wood and make their own toys. My son proudly proclaimed his creation a boat and even rowed with some oars. My daughter made a bowling alley complete with a pin made from a Pampered Chef drink holder.


Sometimes they need something new to stimulate them. Having so much room on our acreage, we have talked about getting one of those fancy play sets. However, since our remodeling is in flux, and we might be doing an addition, we didn't want to build something to just have to move it 6 months later. Not to mention they cost as much as my first car. So we needed mobile play toys, and due to said remodeling, we don't want them to cost an arm and a leg. Last year, I made a outdoor play kitchen out of some of the materials we demo-ed from our kitchen. That was an entirely free project. (Click here for the post)


When I was a kid my two favorite playground toys were Merry Go Rounds and Teeter Totters. I loved them. However, due to safety concerns, many of those things are being removed from playgrounds today. However, if you ask me, some of the new playground equipment gives me heart palpitations (it's all so high!).

Ana White posted a really fun, easy and cheap project a while ago for a Teeter Totter. (Click here for the instructions) I put the idea in my back pocket for when we finally got our own place. I decided to buy the wood a couple of weeks ago and since we had a free afternoon, we decided to build it yesterday.

I have to tell you. This was one of the easiest projects I've ever done. I got to use my new miter saw, and with that tool, the project went very fast. Ana White wasn't kidding when she said it took 45 minutes. Ours took a bit longer, but that was with two kids that wanted to help, then needed to nap and a husband that got called out to look at a sick cat. Typical weekend.

Check out our DIY Playground!


I also decided to create a balance beam with a 4x4 and 2x6. 

We now have the play kitchen, teeter totter, balance beam, a rope swing and a couple of Little Tikes slides and wagons. I think I'm going to complete the mix with a DIY Playhouse. I might be feeling a bit overly confident after the teeter totter.


Share:
Blogger Template Created by pipdig