Hi There!
I have a little project to share today. I am one of those moms that likes to put flower headbands on her little baby. I like how it makes my little one actually look like a girl (since all babies look alike).
This project is very easy and for the flower, you don't even need a sewing machine!
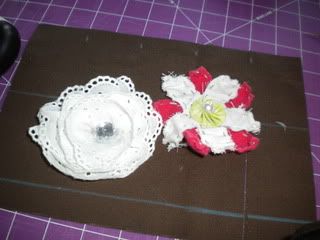
I used this tutorial from Little Miss Momma to make the white lace flower. The other flower is a gift from my sister-in-law Tessa (she made the quilt featured in a previous post)...no tutorial for that one since it's her custom design! You can either attach the flowers to headband like the tutorial suggests. Or do what I do and attach the flowers to alligator clips with hot glue. That allows you to attach the flowers to either headbands or hats.
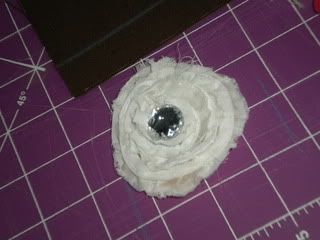
This flower actually came as a mistake. I did the lace flower, but it kinda turned out funny. So I cut away the lace and created this frayed flower. I kinda liked it so I kept it.
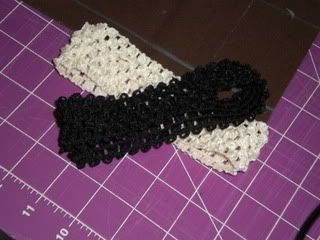
Now you can purchase a headband which can cost upwards of $5. Or you can make your own. Go to the ribbon section and buy the stretchy headband material. At Hobby Lobby the ribbon costs $1 a yard. You can makes lots of headbands within one yard. So...in this picture which one is the store bought one? Which is the home made one? You'll never know!


I have a little project to share today. I am one of those moms that likes to put flower headbands on her little baby. I like how it makes my little one actually look like a girl (since all babies look alike).
This project is very easy and for the flower, you don't even need a sewing machine!
I used this tutorial from Little Miss Momma to make the white lace flower. The other flower is a gift from my sister-in-law Tessa (she made the quilt featured in a previous post)...no tutorial for that one since it's her custom design! You can either attach the flowers to headband like the tutorial suggests. Or do what I do and attach the flowers to alligator clips with hot glue. That allows you to attach the flowers to either headbands or hats.
This flower actually came as a mistake. I did the lace flower, but it kinda turned out funny. So I cut away the lace and created this frayed flower. I kinda liked it so I kept it.
Now you can purchase a headband which can cost upwards of $5. Or you can make your own. Go to the ribbon section and buy the stretchy headband material. At Hobby Lobby the ribbon costs $1 a yard. You can makes lots of headbands within one yard. So...in this picture which one is the store bought one? Which is the home made one? You'll never know!


